Today, We are gonna show you how to make a double mortise and tenon joint.
The classic mortise and tenon joint is a hallmark of high-quality furniture, but there are some cases where a double mortise and tenon could offer some benefits.
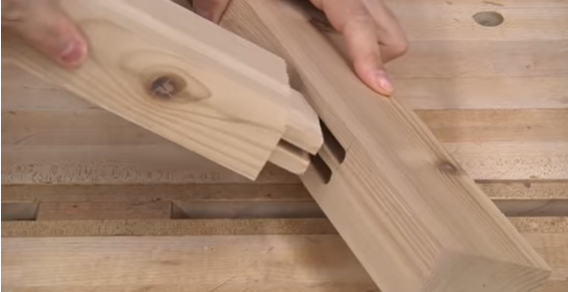
In larger work pieces, such as these, a double mortise and tenon joint actually offers twice as much surface area for the glue, so instead of just having these outside cheeks as glue surfaces.
Now you have two inside cheeks in addition.
And that could very well make the joint stronger.
Just like any other joint, there are a lot of different ways that you can cut it.
If in the factory, normally there are prefessional machine to do the mortise and tenon as WINMAX MCM series & DET series.

But we’re gonna use the router to do the mortise, and the table saw to do the tenon.
Mortise
Lay out for the mortise
Now, the first thing I need to do is lay out the mortise, so I’m just using one of my tenon pieces here to mark the start and stop point of the work piece.
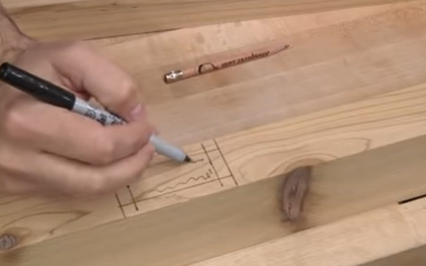
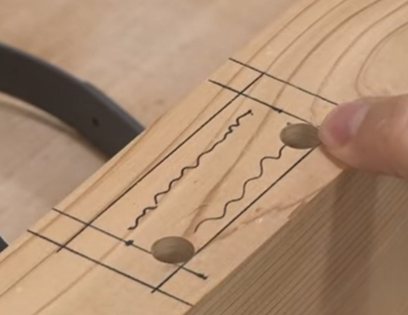
And now I need to draw in all of my shoulders, what’ll essentially be the tenon shoulders later.
But this mortise is gonna start at 3/8ths of an inch in from each edge, and 3/8ths of an inch from the outside edge of the work piece.
This is the area that we’ll be doing our routing, and we stop at these inner lines.
Now, I want a 3/8ths inch mortise, so I’ve got a 3/8ths inch router bit in here.
And of course an edge guide, which is gonna help me set it the right distance from the edge of the work piece.
And it’s really just a matter of pushing the bit down, making contact with the work piece, and lining it up with the pencil lines.
Use Router for Mortises
Now, I stopped here because I wanted to show you, this is a really cool technique that I like to use when routing mortises, and that is to plunge at the beginning, so I get pretty close to my line, and then plunge at the end.
What this does is it gives me a nice area where it’s very clear where I’m hitting wood, and then once I feel the router hit open space, I know I’m done.
If you don’t do that, a lot of times you can very easily go way over your line, because every single time you route.
As you’re going deeper and deeper, you have a chance of going over.
All right, so this a way to ensure that you don’t.
Now you see the magic with that process is the fact that the edge guide is in a fixed position.
Nothing moves, so we make one mortise from one side, flip the piece over, and make the other one from the other side.
Ensures that they’re both equally distant from these outside edges, so it makes it perfect.
Now, at this point, you would wanna cut all these double mortises throughout your project.
You probably have more than one to do, so you’ll wanna cut them all.
You want to grab a second piece that’s sort of a piece of scrap, that’s exactly the same dimensions as your actual work pieces.
Because what we need to do is remove the center section just for the sake of setup.
All right, so you would change your router at that point, and again, you’ve already cut all of your mortises.
So it’s okay to change this router setup if you’re thinking in terms of a larger project.
All right, so change the setup so that the router bit is now cutting in the center of that joint, and you’ll clear it out.
It will look something like this, and this is what we’re gonna use for our initial setup.
Tenon Joint
Mark the Tenon
So, let me just grab a tenon piece and we’ll get started.
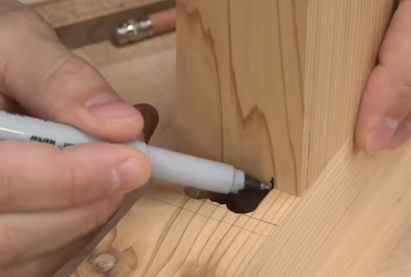
I’m just gonna bring my tenoning stock right over that test mortise, make sure it’s nice and flush on the outside edges, and then mark the outer walls of the mortise.
Now, I’m gonna use a Sharpie here, but obviously, you’d want to use a fine pencil for this.
So, I’ve just got my cutting gauge here, and I’m gonna use that to establish a nice cut line all the way around the perimeter.
Use Table Saw for Tenon
That’s gonna sever the grain, and even though we’re gonna use the table saw.
It’s really gonna help us get a nice, clean cut with no tear-out.

The first series of cuts at the table saw will be all the way around the work piece to create the shoulder.
So I need my blade to be set at that pencil line, or just a little bit below.
And now I’m gonna bring the fence in to set the shoulder cut.
The miter gauge is gonna hold the work piece nice and steady, 90 degrees to the fence, and we can make all four of the cuts.
And once again, thinking in terms of a larger project, you would wanna make these cuts on all of your tenon work pieces before you monkey with the setup.
Use Tenoning Jig for Tenon
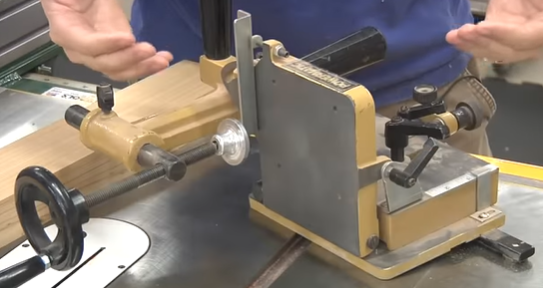
This is my tenoning jig.
It’s a pretty straightforward device.
Basically, the work piece is held up against this plate, you’ve got a fence in the back that is adjustable for various angles.
But mine is set 90 degrees to the table, and it’s got a built-in clamping mechanism.
It’s very easy to adjust the plate back and forth to make very precise cuts.
Now, you can make something like this yourself.
I’ll even link to a couple of plans in the show notes if you’re interested in that, but you can make them so that they ride on your table saw fence.
This one rides in the miter slot.
Now, before we can actually use that jig, we need to raise our blade height, just so that it’s going to the end of this shoulder.
You certainly don’t want to cut into this shoulder material.
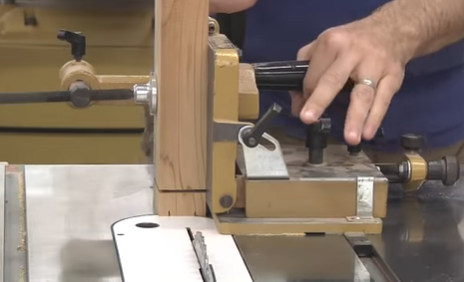
Now I’m gonna secure the work piece into the tenoning jig, and bring it right up to the blade.
Now, just gonna adjust the jig so that the blade is cutting just on the outside of this line.
That looks pretty good.
All right, so I’m gonna make one cut on this side, and then flip the work piece and make a second cut on the other side.
Test Fit on the Open Mortiser

Now, we’ll do a test fit on the open mortise, and that’s a little bit snug.
Adjust the jig, and make a second round of cuts.
Now, we’ll do a test fit. That’s not bad.
That may be just a hair loose, but honestly, I could live with that.
So, now that we have that dialed in, we’re gonna cut the piece this way to get rid of the short shoulders.

Now, once again, if you’re batching out, you’re gonna wanna do all of your tenon pieces and catch them up to this point before you change your setting at the table saw.
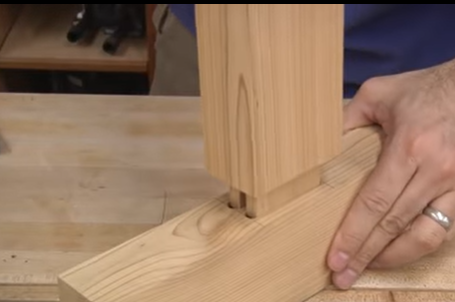
All right, so, if we want to move on to the next phase, we just line up this tenon with one of our actual double mortises.
Make sure it’s pretty well-lined-up with the outside edges, and then you wanna mark the location of the inner walls here.
We’re gonna sneak up on it just like we did with the outside cheeks.
Final Cleanup
All right, so we do have a little bit of cleanup to do.
Let’s head back to the workbench.
Now, you’ll very likely have some residual material in the inside corners here, which you could very easily remove with a downward chop and a chop inward like this.
But the biggest offender is likely to be the space between the two tenons, so you just need a narrow chisel, you’ll be able to remove that.
And if you have any unevenness in your shoulders here, you can usually feel it with your fingers, this is a great job for a shoulder plane.
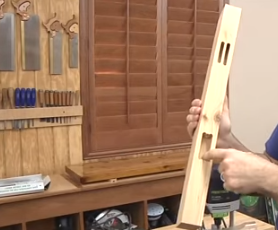
So, now let’s do our final test fit here, and see how we did.
Now, this isn’t really the kind of joint that you’re gonna bust out on every single project.
But, if you have something with large work pieces where you have enough real estate in the material to make a double mortise and tenon joint.