
It’s a Strat-style guitar body cut on the Winmax desktop CNC router.

It’s a really neat project for those of you that are looking to make a guitar, but it’s also really cool if you’ve just been looking at buying a small CNC router because we’re going to cover pretty much everything that there is to do, from 2D cuts to 3D milling.
We’re going to flip the part over and cut the backside, and we’ll need to index it in order to do that, so regardless of what you’re going to do with the CNC Router, by the end of this post you’re going to know how to pretty much do it all.
Just to briefly describe the process, I’m bringing in a drawing that I found online, and I’m going to trace it in a software called Rhino.
Then I’m going to model that. Then I’ll use RhinoCAM, a plugin which exists within Rhino, to describe how I want to cut that. It’s called toolpathing, and that is what’s going to describe to the CNC routrer, whether you want to do a 3D cut or a 2D cut, what all that looks like. It’s a really nice workflow because RhinoCAM exists within Rhino, so instead of needing two separate programs to get all of this worked out, it actually happens in the same program. Any change that I make to the model is directly reflected in the toolpaths.
We’re going to design this entire guitar to be cut with two bits.
One of them is a three-eighths inch down flute, which is a flat bit that we’re going to use for all the 2D milling, and the other one is a ball end, also a three-eighths inch, that we’re going to be using to cut any 3D contouring.


I picked up this fantastic alder wood blank. It’s one and three-quarter inches already, which is the thickness of the guitar, so there’s no need to fly cut it, and it looks fantastic. I’m not even sure I’m going to paint this one.
Now, I’ve been told I’m pretty good at milling, but I am definitely not a professional luthier, so I found everything for this project on Amazon. It’s already pretty much ready to go.
Step to on Rhinoceros
Next, we’re going to take a quick look at the steps that I did within Rhinoceros. Modeling in Rhino may at first appear intimidating.
There are certainly a lot of buttons, but as I’m going to show you, the process for making this guitar is actually pretty straightforward.
First Stage
In this first stage, all that we’re doing is just tracing out the 2D shapes that we’ll use to model the guitar. I’ve traced this outer contour, I’ve traced all these interior curves.
Second Stage
The next step I’m going to use the extrude command to turn it into a solid surface. I’ve extruded the outer shape. I’ve also extruded all of these interior curves, and then what I’m not showing you here is I used a simple command called “boolean difference”.
It’s a weird name, but all that it’s doing is subtracting one shape from another. I extruded these interior curves, and then I used that to subtract it from the overall shape. That’s how I arrived at this stage.
Third Stage
In the next step, I’m using the same basic procedure. I have a curve right here, and I’ve extruded it into a surface.
I’m then using the trim command, which is similar in many ways to the boolean difference command. I’m using the trim command to trim away this upper area of the guitar. Now, we have that contour.
Last Stage
Then in this last stage, we’re just going to round over these edges, and the way that we do that is using another command called “fillet edge”. It essentially you select all the edges that you want it to apply to, and then you select the radius that you’re going to use, and it fillets the edge.
It’s really quite simple, and that’s the basic process for how we make the guitar. The back of the guitar is pretty much the same thing. You can see I already have it modeled here. That’s pretty much it, and you’ll notice on my finished guitar I actually ignored modeling some areas. Like this curve I didn’t even bother to model it.
The truth is: Any of these 2D shapes where you’re just going to be doing a regular 2D pocket operation, you don’t need to model them.
I find it helpful to see how deep I’m cutting and to get an overall idea of the guitar that I’m making, but it’s not necessary. You can simply specify when you’re machining it how deep you want that to cut.
How to Toolpath the Guitar
That’s the process for how you model the guitar, and next I’m going to explain how to toolpath the guitar so that the machine can eventually run it. All right, so I have RhinoCAM open on the left side of my screen here.
You can see that it adds two modules. The top one is all of my operations, and the bottom one is a tool library. Right now, I’m just dealing with two tools. I have a three-eighths inch down sheer that’s a flat tool, and a three-eighths inch ball end that I’m going to use for all of the 3D parts of the guitar. I’ll give you a brief overview of what all of these are doing.
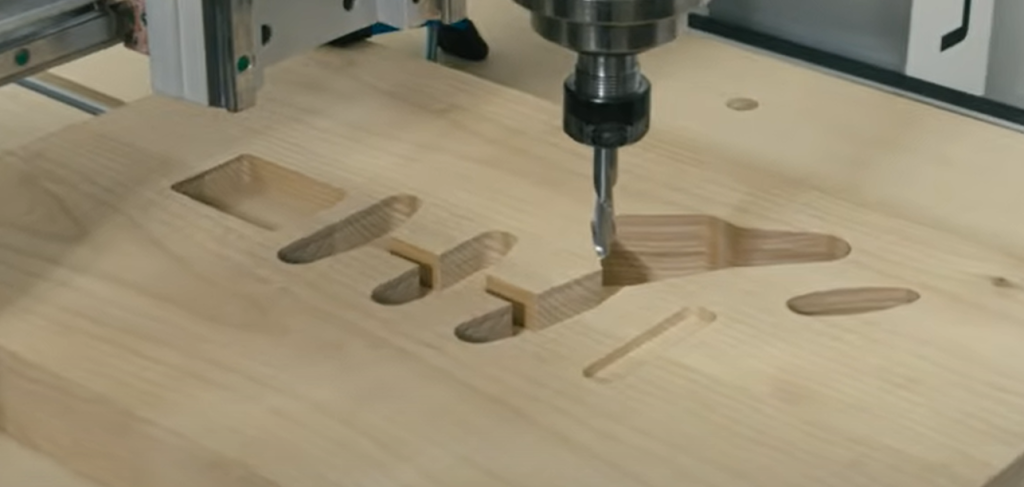
First,2D Contour
The first operation you see here it’s a 2D contour, and it’s just pocketing all of this, just hollowing it out. We call that a pocket. You can see that it’s doing it in two passes, and that’s three-eighths inch down per pass, which if you’ve seen some other videos about making guitar online then you might notice that’s pretty substantial.
A lot of the desktop routers aren’t able to cut with a bit this big, this fast, this deep, but it’s not a problem for the Winmax IQ, which is part of the reason why I like the machine so much.We’re doing a similar operation kind of for each area.
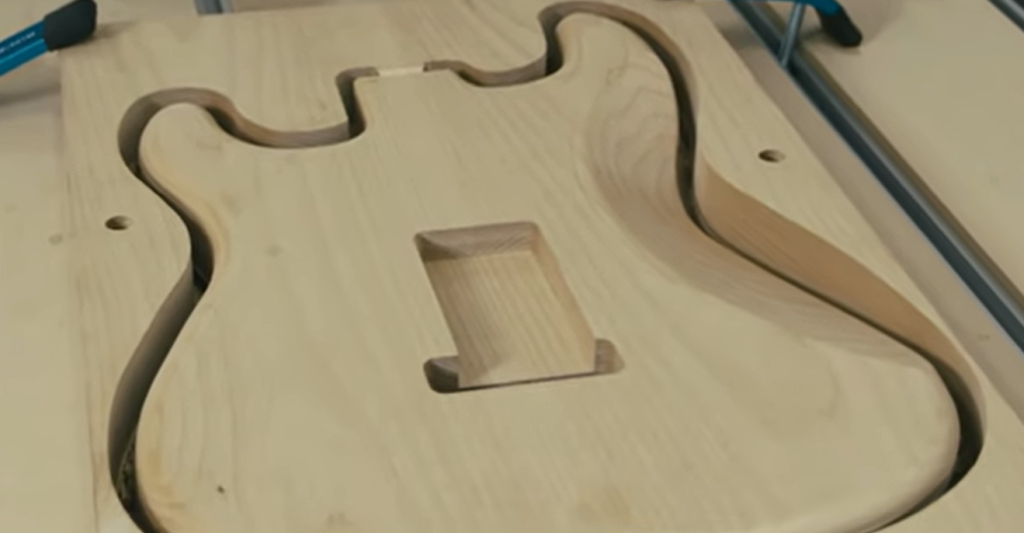
Second,Cutting Further Down
In this next one, it’s cutting further down in here. Then we’re cutting out this back area. We’ll cut out this section right here, and lastly we’re cutting out this area, which you can see I didn’t even bother to model that as I explained before, but if I go to the simulate tab really quickly you can see all I did was specify the depth. I actually did that in the operation itself, so there was no need to model it, which in the end that’s just up to the individual user which way they prefer to do it. I just wanted to show both here.
Last, Horizontal Roughing Pass
Lastly, we’re doing a horizontal roughing pass.
This is still using the flat bit. I’ll show you what it does. Let me slow that down a little bit. It’s cutting layers, and it does it in such a way that that’s obviously not the final end product that we want, but it’s carving away a lot of the material so that when we come back with our finished bit, there’s very little resistance on the bit, which makes the finish that much better.
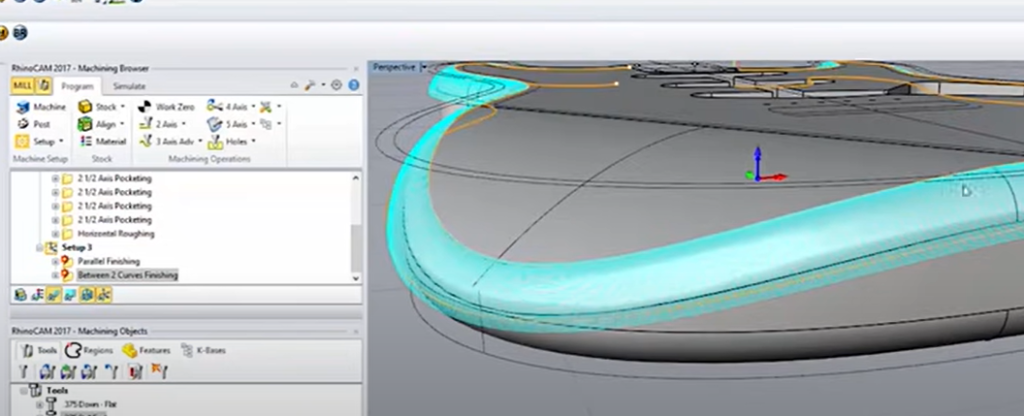
That’s what the finish bit will do. I’ll play that really quick. Speed that up. Lots of little passes one after the other, and you wind up with a really smooth surface. You can see that’s the round over bit that we’re using, and then finally we’re going to do the outer curve around the entire guitar, so that’s this.
That’s a pretty nice operation. You don’t get that in simpler programs.
It’s called between two curves finishing, and it allows you to select an interior and exterior curve. It stays within that boundary the entire time, and it tries to match those shapes. Following these curves, but it’s looking at the model itself.
It’s kind of doing both, so you can see here what that means. That’s what it’s going to do. It’s pretty nice because as opposed to just doing a regular horizontal pass, this one will actually follow the contour down towards this direction. It doesn’t just like traverse in layers or something like that. It actually follows the curve down.
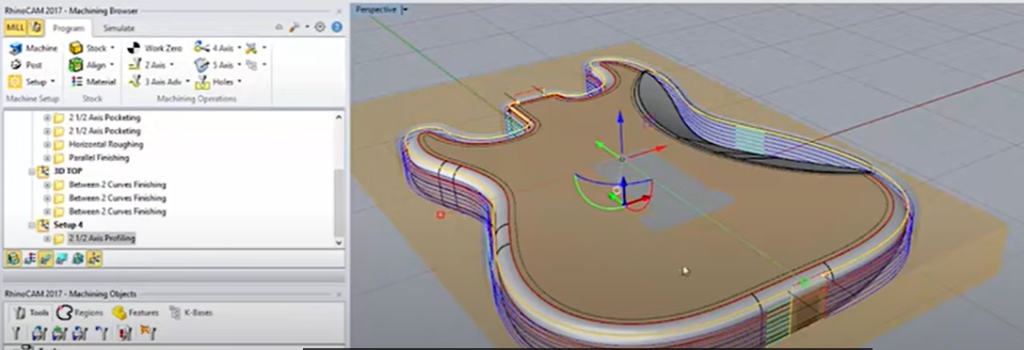
What that means for you if you’re using this program and you’re using that operation is it gets done faster and it usually looks quite a bit cleaner than if you were to do it some other way. Now, let’s talk a little bit about the flip because the flip is an important part of any guitar. I don’t know any guitars off the top of my head where it doesn’t require a flip at all. Whenever you’re flipping, I’ve seen some cool vacuum jigs that companies make if they’re doing a lot of the same guitar, but if you’re just doing one guitar, one of the easiest ways to do it is just by indexing it with pins. So you see here I have some half-inch circles that I’ve cut down, and if you look at the toolpath I’ve actually told it to cut down a little bit beyond the material itself, so it’s going into the spoilboard.
What that means is I can drop in some dowels that are half-inch, and I can flip the part and it’ll be correct when I flip it. That’s part of the reason why I’ve centered the part within the material and on the origin is so that when I do the flip, everything is perfectly aligned. The process for the backside of the guitar is going to be very similar to the front side. I’ve created a separate file where the guitar is flipped. You can do it in the same file if you want, but I find it a lot more confusing.
I like to have them just be two separate files. That’s personal preference, though. You’ll see I have the holes that I use to index, and then the process itself quite simple. There’s some 2D pocketing, and then there’s the 3D roughing pass, 3D finishing pass. You’ll notice it looks like there’s some roughness here, but if you zoom in it’s actually negligible.
It’s extremely smooth, and that won’t even be noticeable on a machine. That’s like .0000001.

Then lastly we have the round over finishing, which is done the exact same way. I split it up into three areas because this particular area is a little bit tricky.
It does have to shrink down into a smaller fillet for the guitar neck area and then widen back up, so just to make things easy on myself I split it up into three sections. Again, it’s just following the curves, so what that means is, just to show you. If I click …
Just to show you, what I’ve done is I just broke apart the curve, so this area is following this curve, and then I did the same operation and just selected this other curve. That’s why those are done in three separate sections. Lastly, we have the cutout, and let me just show you what that looks like.
Pretty straightforward. You’ll see that I made it out of two separate curves, so this middle area isn’t being cut at all.
That makes this very, very large tab, which we’ll use that tab to hold the part together because otherwise there’s nothing holding it in place. Obviously, if you look at what some of the companies do that make tons and tons and tons of guitars, if it’s like the same guitar over and over again, you can create a vacuum jig which will hold the guitar in place while you’re cutting it out.
That’s a great way to do it, but if you’re just making a guitar once you can use the indexing method with these tabs and you’re good to go. I’ll just show you what the simulation looks like. You’ll also notice it’s not cutting all the way through.
That’s because we already know we’ve rounded off the front side of the guitar, so there’s no need to go all the way through the material. It’s already going beyond that rounded edge.
That’s it. That’s the guitar. You’re done.
You’re going to see I’m using that three-eighths inch down cutter, and we’re cutting passes until we reach the depth that we need. That pass is the diameter of the bit, in this case three-eighths inch, so I’m cutting that deep per pass, as many passes are needed to achieve the depth that I want to cut.
That’s pretty good for what you can do on a desktop router. A lot of machines wouldn’t be able to cut that deep per pass, and they definitely wouldn’t be able to do it as fast as what we’re cutting right now. Next, we’re rounding over the part, and to do that we’re going to use that ball end, and it’s going to do passes slightly over from the previous one until it achieves whatever 3D shape we want.
As far as post-processing goes, all I did was cut off the tabs on the bandsaw and then sand everything down with 80 grit then 220-grit sandpaper.
I’d say it took about 10 minutes, and that’s it. For those of you that love making guitar by hand, probably the best way to go about this is to simply skip the 3D cuts entirely that I’m doing and just focus on the 2D cuts, which go by really quickly. Then you get the body with all the cutouts, and you’re able to just quickly get into the fun part, all the contouring involved. It gets you to that stage very quickly with no effort.
As you can see, we’re using these little metal pins, they’re half-inch, to index our part. You could use wooden dowels. I’ve also seen people, like if you’re really making a lot of guitars you could create a vacuum clamping system, but ultimately this is really all that’s necessary so that when you do that part it is perfectly center so that when you cut the back it all lines up.
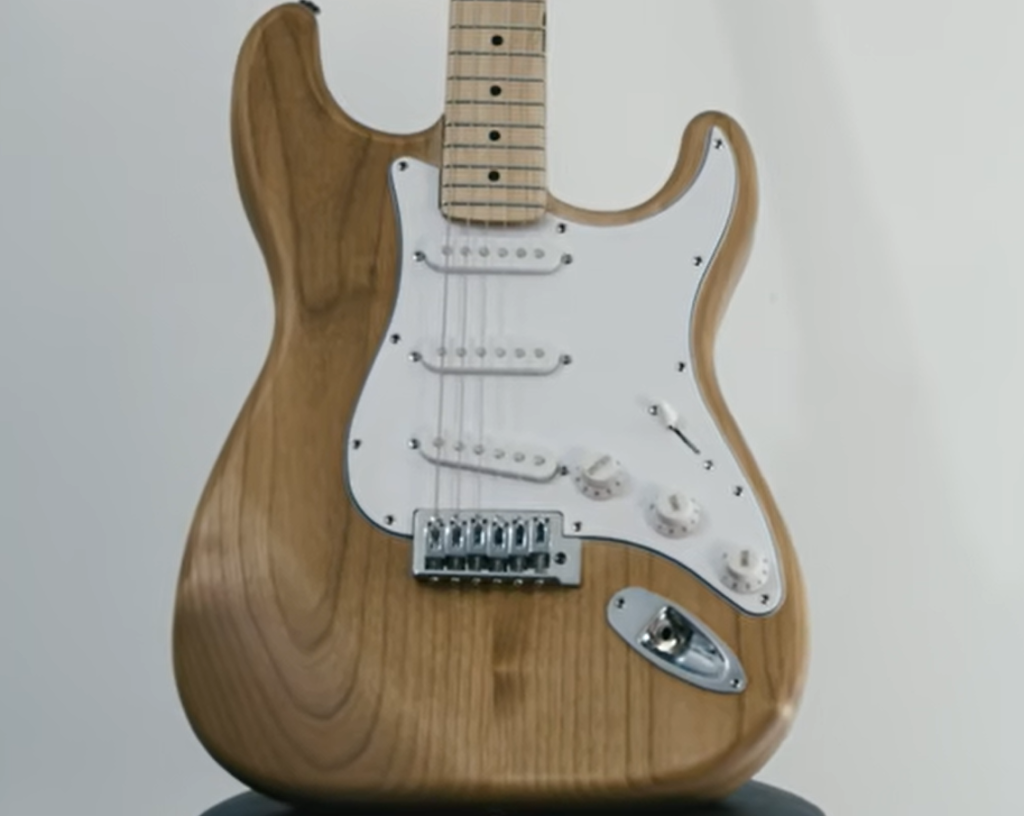
I just finished up the guitar over the weekend, and I have to say it looks amazing, and for the cost of the parts, it sounds really good, too.
Thanks again for watching. I hope you found this very informative, and stay tuned for more videos from Winmax Tools.