Is the Winmax DC001S dust collector worth your money?
Does it suck?
How easy is it to assemble?
In this post we’re gonna answer all these questions plusmore so make sure you watch the entire progress.
I want to give a big thank you to Winmax for sending me this dust collector to make this post.
I also want to be transparent with you guys ,letting you know that they did send me this item for free to make this post. But everything in the post that I say is my honest opinion.

So this is pretty much it. I know there’s probably some pieces in that box over there. But it doesn’t look too difficult to assemble. So, let’s find these instructions which are right here, and i get this assembled.
Assembly
So these are gonna be all the pieces you need to make your base mobile.
You’re going to take your strap that has a pin hole on one side and you’re going to slide it inside these.Two holes on the back of the base.
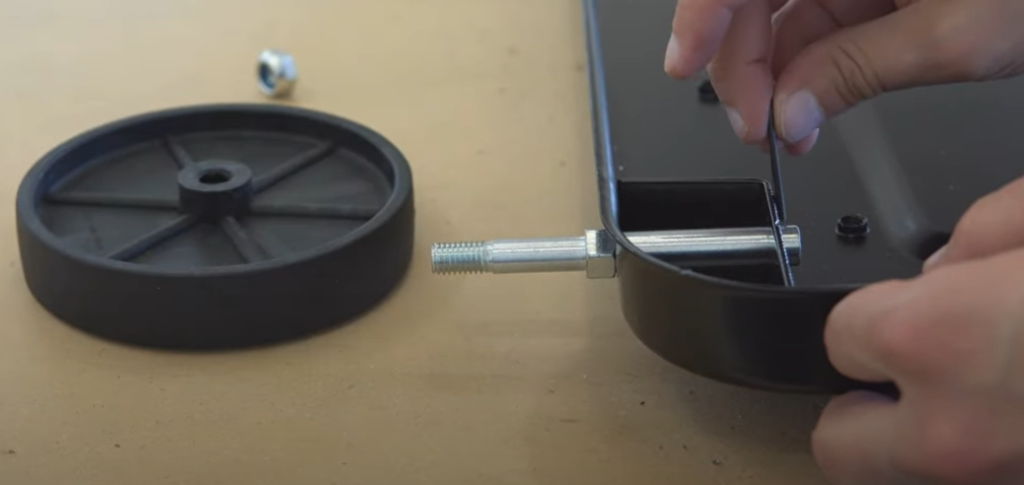
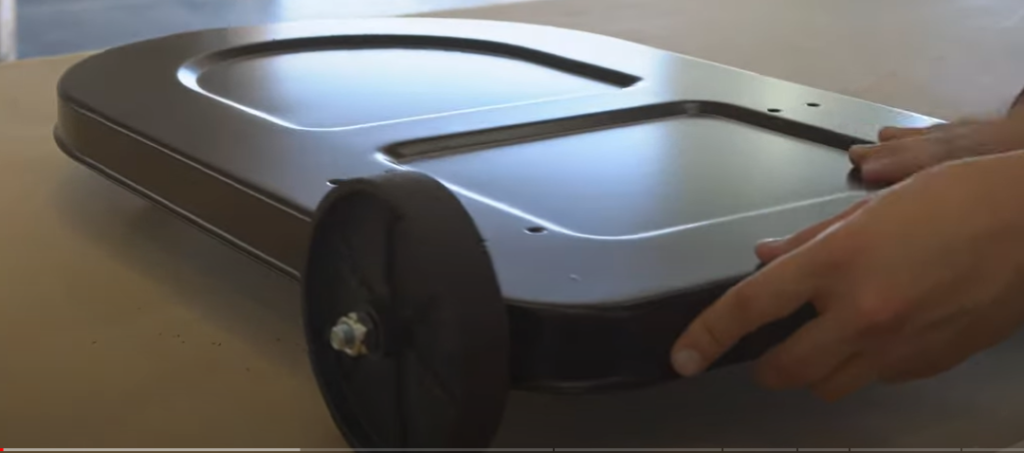
Next add your pin to the strap so that it won’t slide out. Add your wheel and secure it with the nut.
Make sure you don’t tighten it all the way or else. Your wheel is not going to spin because the pin back here is going to hit the base.
You’re going to get this it’s not going to spin so there you go now. For the front of the car very simple,you just line up put your screws in you can’t really mess that up.
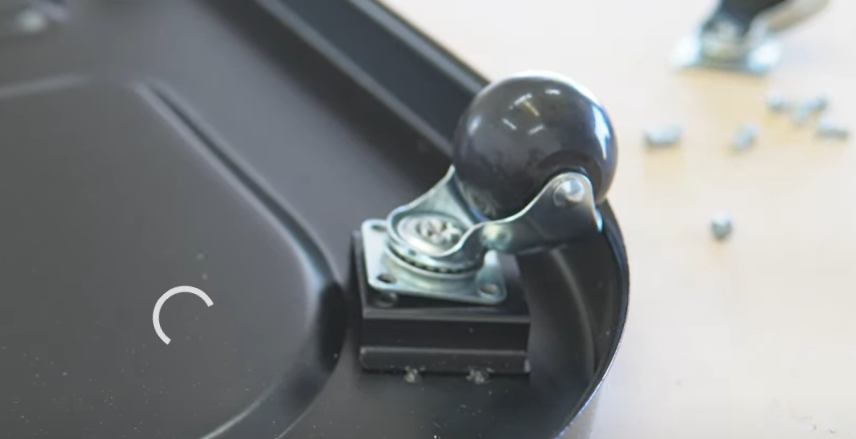
So you know how I said you can’t really mess that upwell.
I did, you have to add a washer to your screw. So don’t forget that step.
And you do the same for the other side.
Next we’re gonna add these supports on the base now. There’s four holes on the bottom of the support.

There’s four holes that line up with the base, so you just grab your support make sure the open area is facing in towards the other support.
You’re just gonna use this short screw or bolt it down.
So bucktail just apply this tool that comes with the kit it fits this wall perfectly so you could tighten it, but for the most part you can use your hands on these and then just use the tools to get it snugged.
On the bottom of our housing assembly, there are four bolts, two on each side, where supports are going. To line up, we need to remove them, so that we can slide our housing on top of our supports.
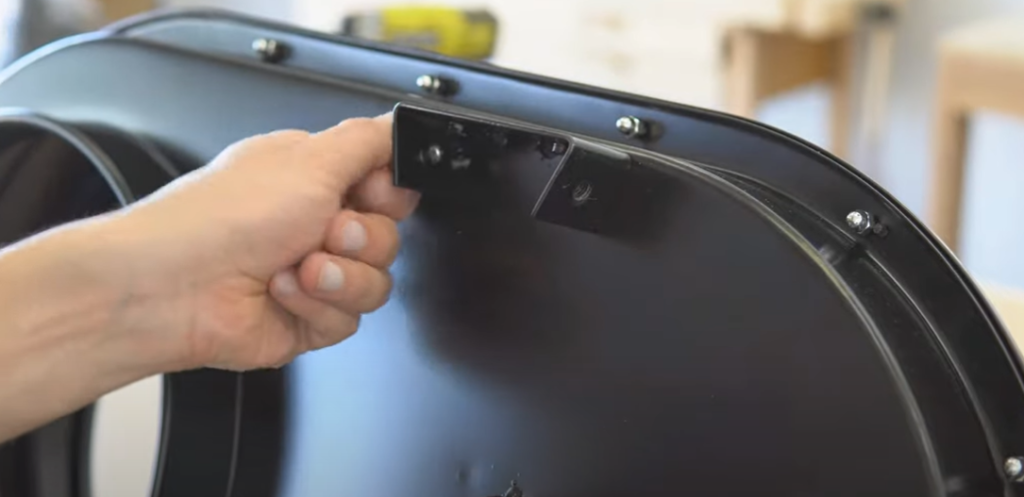
To secure filter bag and dust bag. Use these straps that look and act like belts.
You have to loop it through your bag and then just clamp it down very simple.
So that’s going to be how you assemble the Winmax DC001S and by far the hardest thing on the whole assembly was installing this bottom bag down here.
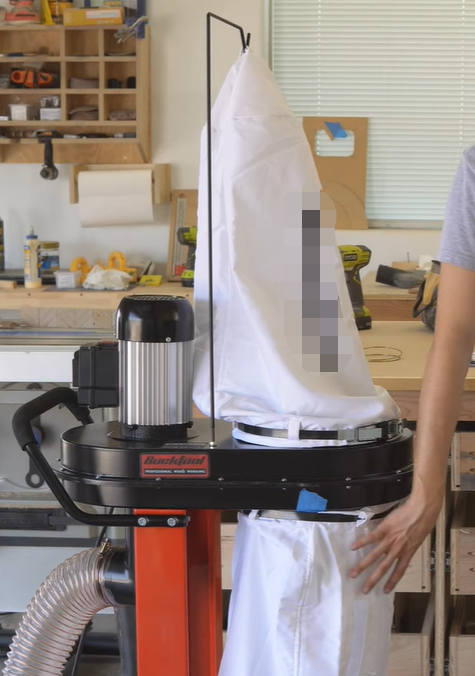
There’s plastic bag that goes inside of this white bag here and it’s pretty much impossible to keep this plastic bag up here.
While i was trying to put on this white bag, i ended up using blue tape as you can see right here as another pair of hands to hold this up.
And even with that i had to lay it on its side to not work against gravity. So it has to be a better way, maybe i’m just doing it wrong. I never on a dust collector, but that’s the way I did it.
I’m not looking forward to changing out that bag when it gets full of dust but I’ll let you guys know how that goes then.
Noise Test
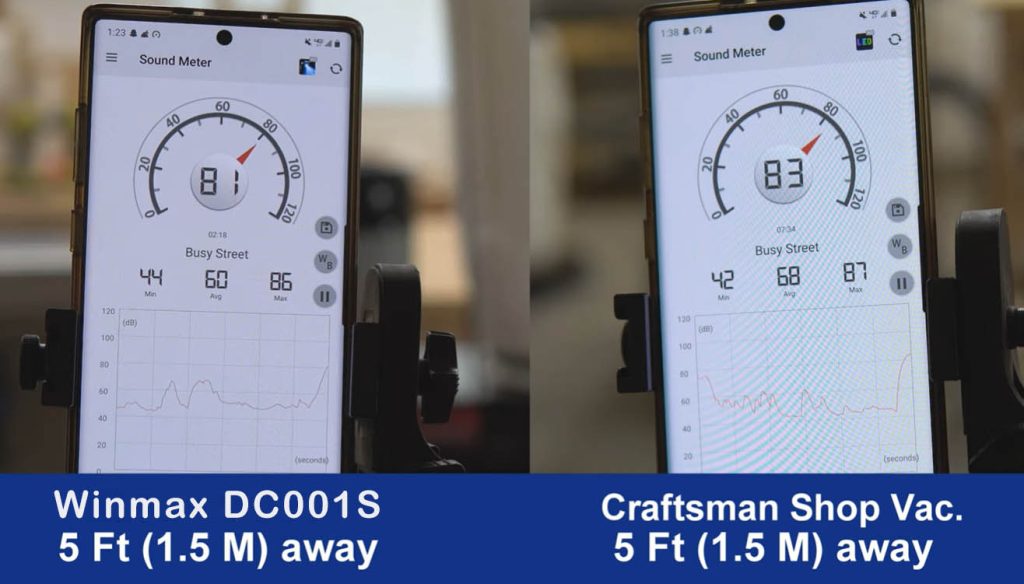
So the first test i did on the DC001S is a noise test. I recorded the sound from four different spots in or around the shop.
Using a decibel reader app on my phone.
I also decided to compare my old shop vac to the dc50 to see if it was any louder.
The first decibel reading was 5 feet away from the dust collectors. Because my shop is small.
The second reading was from 10 feet away from the dust collectors. After that i went inside the house and took the decibel reading from the other side of the door to see how loud it would be inside the house.
The last place i took the decibel reading was from right outside the garage door. I wanted to see how loud it would be for the neighbors.
I was quite shocked to see that the Winmax DC001S was not any louder than a shop vac when. It has over six times the sucking power or CFM.
CFM Test
Speaking of CFM, that’s the next thing I tested. Winmax claims that the DC001S has a cfm of 750.
To test this i bought an anemometer and held itin front of the flexible dust 4 with three different sizes.
Planner Test
I was not able to connect the 4 inch hose to my planer. It just would not fit. I had to use a two and three quarter inch adapter to connect it .I know this is not ideal, but the four inch which does not slide in i’m not sure why.
Auto Start/Stop Planner
This was a good time to test out and take advantage of the auto start feature on the bug tool DC001S .
You just plug in thetool you’re going to be using and it will start on its own when you turn on your tool.
Usually you find stufflike this on really expensive tools.It is a very nice feature to have.
Cutting MDF On Table Saw
The flexible hose that comes with the dust collector is not very long, so we’ll have toupgrade that in the near future, also the power cable on my table saw is not very long.


So unlessthe dust connector is right next to my table saw, i have this mess.
I wasn’t sure if the Winmax would run power tools fine, if i added an extension cord, but it actually worked quite well.
Auto Start/Stop With Extension Cord
Once again, i want to say a big thank you to Winmax for being the first sponsor of this channel. So far, i’m really liking the DC001S .
The only thing that i had issues with was the bag, but i already add ressed that other than that the thing looks great.

