Today we’re gonna look at the difference and uses for two common woodworking tools, the planer versus the jointer.
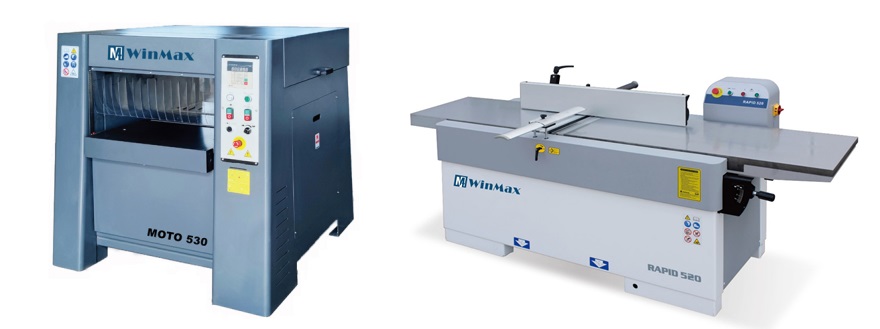
What is planer and jointer used for?
Both of these tools carry a fairly hefty price tag and many beginners, or intermediate level wood workers may not have either tool.
But before you go and spend the money to buy one, it’s important to know exactly what each tool is used for and how it works.
Now both of these are preparation tools, meaning that they are used at the beginning of a woodworking project, to help you get flat, uniform wood to work with.
Why will need planer and jointer?
If you’re just starting out, you may be using whatever construction lumber you can get your hands on from the big box store.
Or you may be spending quite a bit of money on pre-milled hard woods that you picked up from a local specialty store.
In either case, the projects you work on are limited to the material that you buy.
These tools can help you create wood projects in any size or thickness that you want.
Now it’s very rare that wood you purchase doesn’t have some kind of warp or movement to it.
Now I’m showing you three common types of wood warp you may encounter.
Three Common Types of Wood Warp
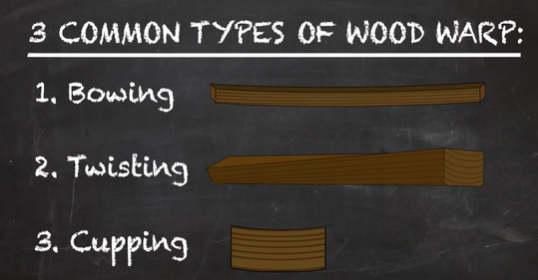
Bowing is when a board has a bend in it so it doesn’t lay flat.
A twist is when the board won’t sit flat on all four corners, so that when you press on one corner, the board rocks back and forth.
And cupping is when the board has a cupped shape where the sides are higher or lower than the inner part of the board.
Depending on the piece of wood you’re working with, it may have one or all of these attributes.
If any of them are severe, it can make working the piece very challenging.
When you have nice, flat and uniform lumber, it’s much easier to create a quality finished product.
And that is where a jointer and a planer come in.
Now a common misconception is that a jointer makes a board flat, when in reality, a planer is only used to make a board uniform thickness.
How a planer works?
So first, let’s take a look at how a planer works.
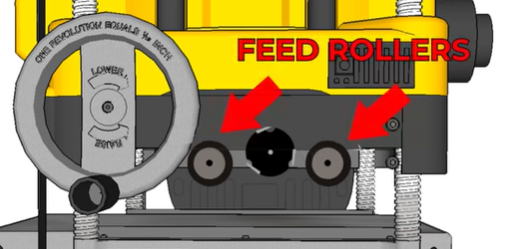
If we were to remove the side of the planer and got a look at the inside, here’s what we would see.
We’d see two feed rollers.
These roller apply downward pressure onto the piece of wood so that it stays flat along the bottom of the planer, while at the same time, feeding it through the planer itself.
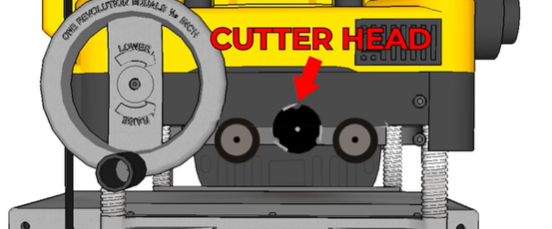
We’d also find our cutter head. Now there’s different cutter head types available but they all do the same thing.
It’s a cylinder that spins at extremely high RPMs and cuts the wood as it’s fed through the machine.
So let’s take a look at how that works with a piece of wood.
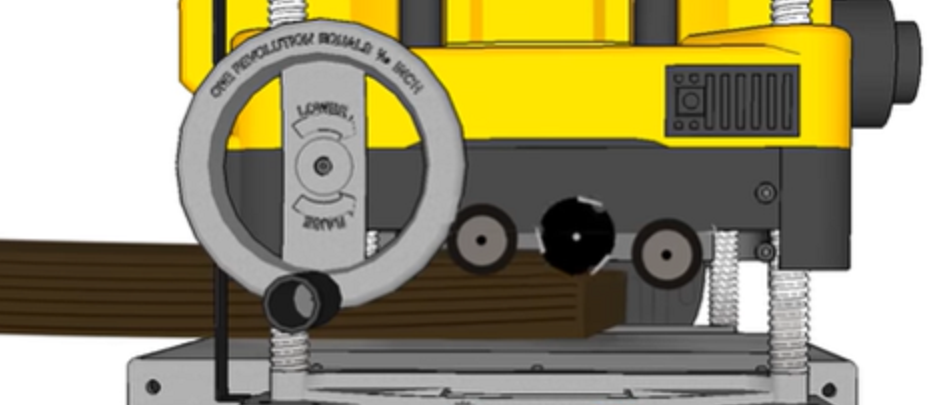
As you can see, the wood is fed through the machine, the roller heads press down onto the piece of wood, pushing it down along the deck, as the blades cut it to a uniform thickness.
Now let’s see what happens if we do this with a piece of wood that has a bow in it.
So while you’ll end up with a piece of wood that’s uniform thickness, it won’t be flat.
If you flip the piece over and feed it through the machine, the rollers will push down on the bow and flatten it out as it goes through the machine.
But as it comes out the other side, the board will spring back to its original shape.
So while your board will be uniform thickness, it still won’t be flat.
The same can mostly be said for a board with a twist in it.
The one scenario where a planer can produce a flat surface is if the piece has a cup in it.
But again, you may have to remove a lot of material to do that.
How A Jointer Works?
So in order for a planer to work effectively, you have to have a flat surface on one side of your boards in the first place, and that’s where a jointer comes in.
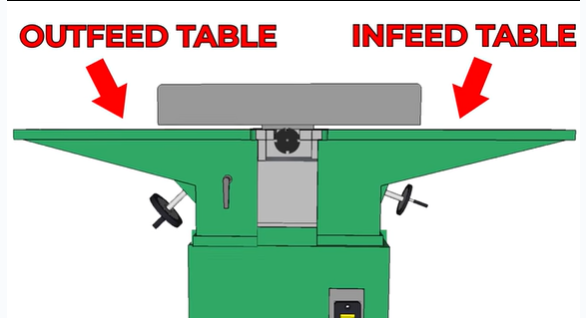
So if we take a look at a jointer, you’ll see we have two table tops that are co-planer to each other, an infeed table and an outfeed table.
Now these tables are adjustable in height, depending on the depth of that cut we want to make. And we’ll also find a cutter head very similar to the cutter head that we have in the planer.
Now if we feed that same bowed piece of wood over the jointer, you’ll see that if we don’t apply too much downward pressure on it, it’ll take out that bow.
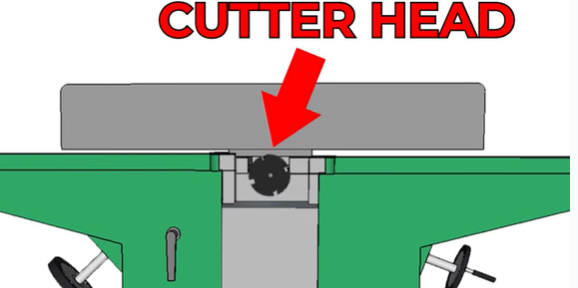
It may take a few passes to do it, but what you’ll see is that it creates a flat surface on the bottom of the board.
However, it doesn’t create a board that’s a uniform thickness.
So in order to create a board that is both flat and uniform thickness, that is why you have both a jointer and a planer. The jointer creates a flat surface for the deck of the planer to reference and create a board of uniform thickness.
Well I hope this video is helpful to you for understanding how a jointer and a planer work, and why they are used for specific applications.
Now if you want to buy one of these tools, but you’re not sure which one, most woodworkers I know tend to start by investing in a planer first, myself included.
