
Welcome to this how-to post where we’ll cover the operation of Winmax
EB280 mini automatic edge banding machine for small shops.
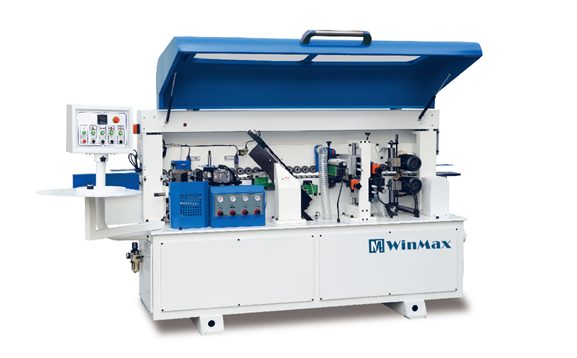
In this post I’ll walk you step-by-step through selecting the proper edge banding material, adjusting the EB280 for use with the selected banding,and proper setup and operation of the machine.
Edge Banding Machine Show
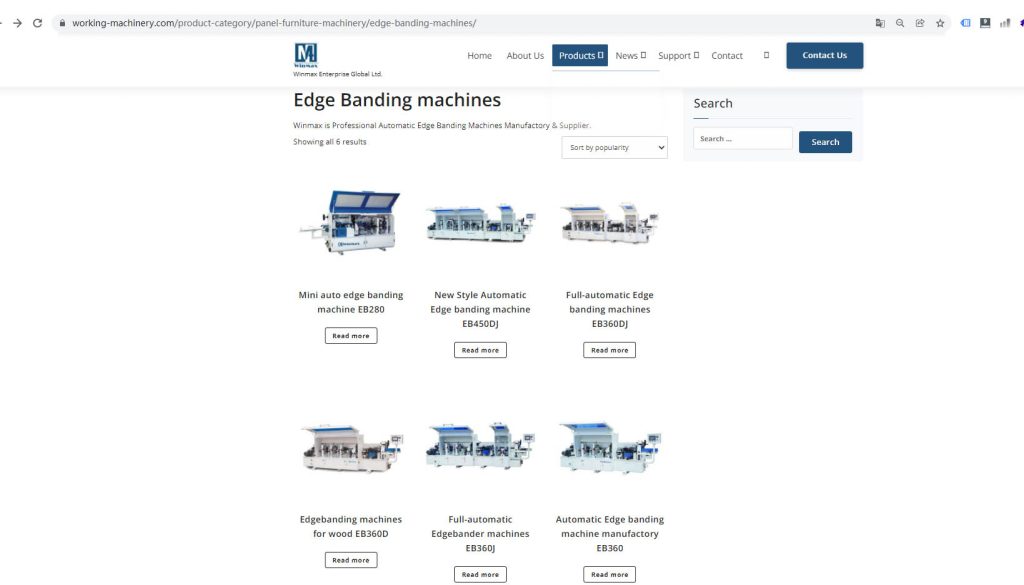
So let’s jump right in and take a look at the types of edge banding machine you can use with the EB280. Winmax offers a large selection of non glue edge banding so check out working-machienry.com to see our whole selection.
How is Edge Banding Machine Done?
The Gule of Edge Banding Machine for small shops
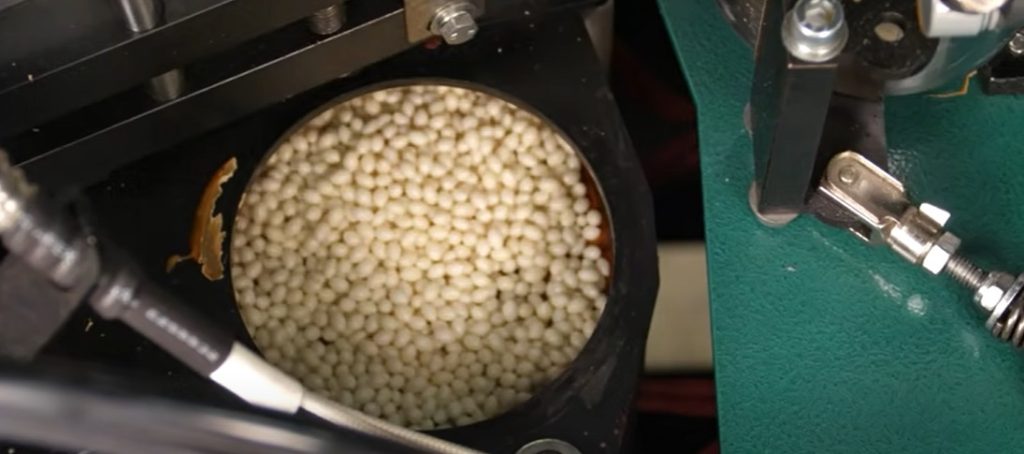
First of all, let’s go to the rear of the machine and check to make sure that you have plenty of glue in the glue pot.
If needed add some pellets until the glue reaches about 3/4 of an inch from the top of the glue pot when fully melted.
Workpiece Thickness
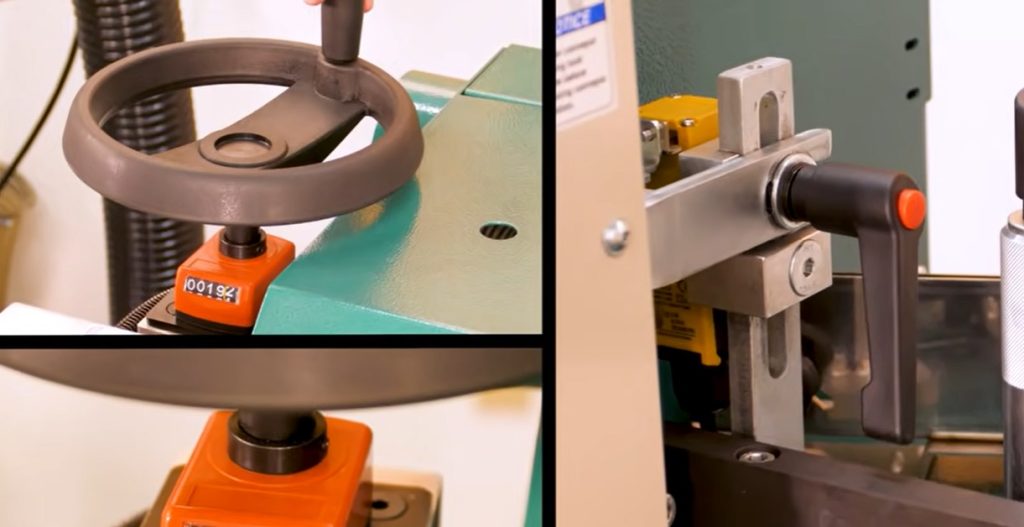
With the glue amount good to go, let’s turn to setting the panel feeder height according to the thickness of your workpiece. To do this, measure your workpiece thickness in millimeters.
Then, loosen the panel feeder lock lever here and rotate the elevation hand wheel until the numerical display shows the same measurement as your workpiece thickness, then retighten the lock lever to secure the panel feeder.
Infeed Fence Position
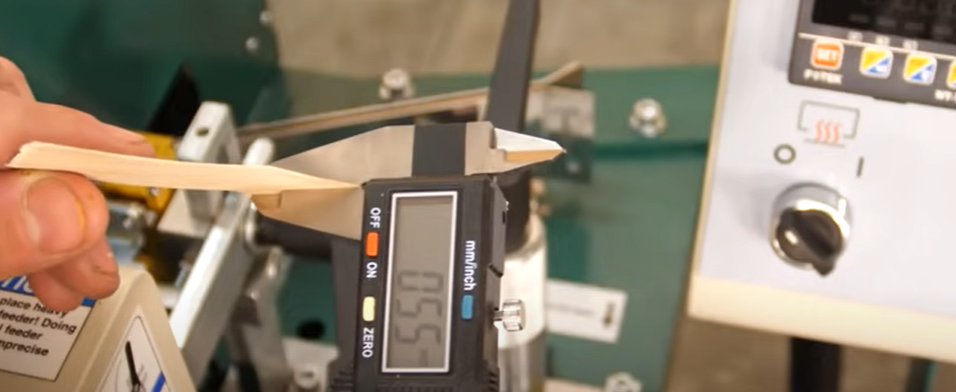
So now that our panel feeder is adjusted, we can now turn to setting up our infeed fence in relation to the edge banding thickness. There are two methods you can use to set the infeed fence position. One is using infeed fence scale. The other is using the infeed fence stop.
Method 1: Infeed Fence Scale
The scale represents the edge banding thickness in millimeters, so all you need to do is confirm your edge banding thickness and loosen the infeed fence lock lever then twist the knurled cylinder until the thickness aligns with the mark on the scale, then lock in the setting.
Method 2: Infeed fence stop
The other method is to use a small 1 to 3 inch piece of edge banding mahcines cut a small piece of edge banding and place it in front of the stop bowl loosen the infeed lock lever and twist the knurled cylinder until the stop plate firmly contacts the edge banding, then lock in the setting.
Glue Spindle
Now it’s time to adjust the glue spindle. This is an essential adjustment that should be checked and adjusted every time the infeed fence is moved, to ensure the best adhesion.
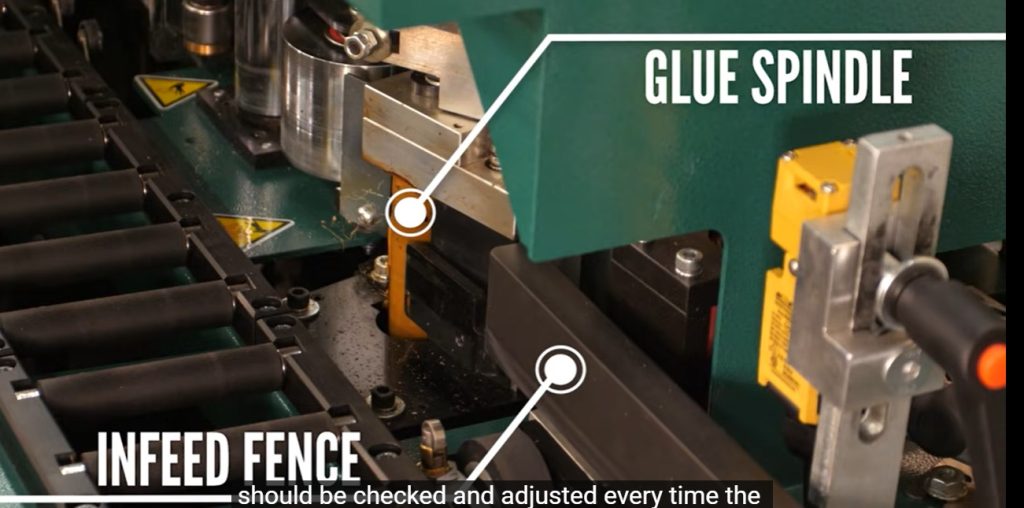
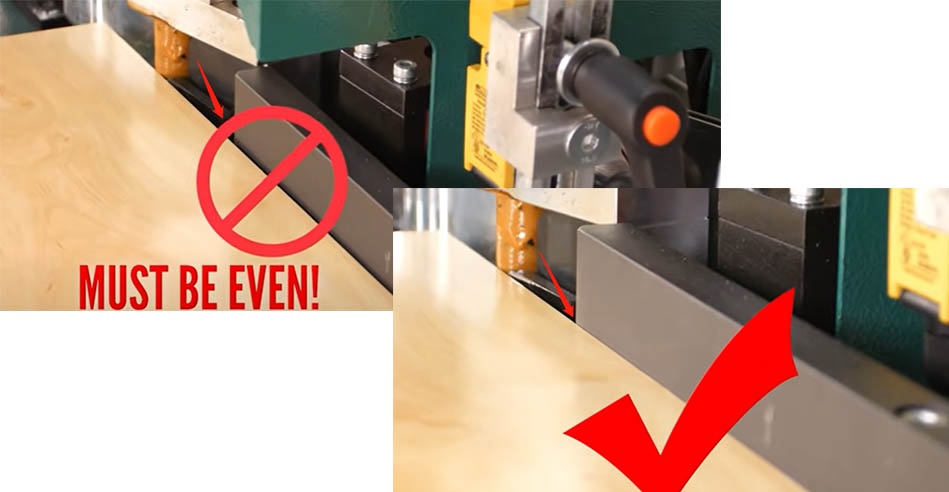
Loosen the panel feeder lock lever and swing the feeder door open to see the glue spindle. Place the workpiece against the infeed fence and align it with the glue spindle.
The workpiece should rest evenly along the length of the infeed fence while contacting the spindle.
If it doesn’t go to the rear of the machine and rotate the glue spindle adjustment knob until the spindle aligns evenly with the infeed fence.
Adjusting Flush Trimmer
Next, let’s go ahead and close and lock the panel feeder in place and head to the rear of the machine to adjust the flush trimmers.
The flush trimmers on the EB280 are independently adjustable cutter heads above and below the passing workpiece that cleanly cut the edge banding to the appropriate thickness before it exits the machine.
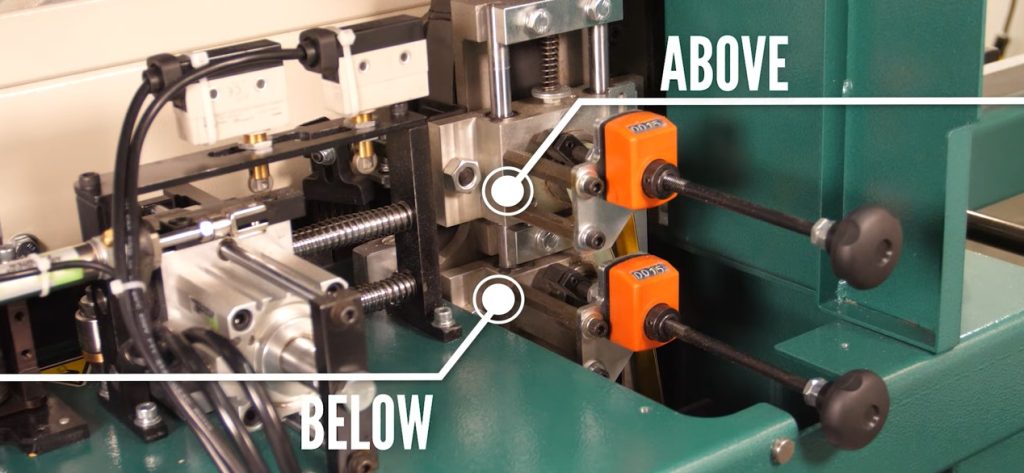
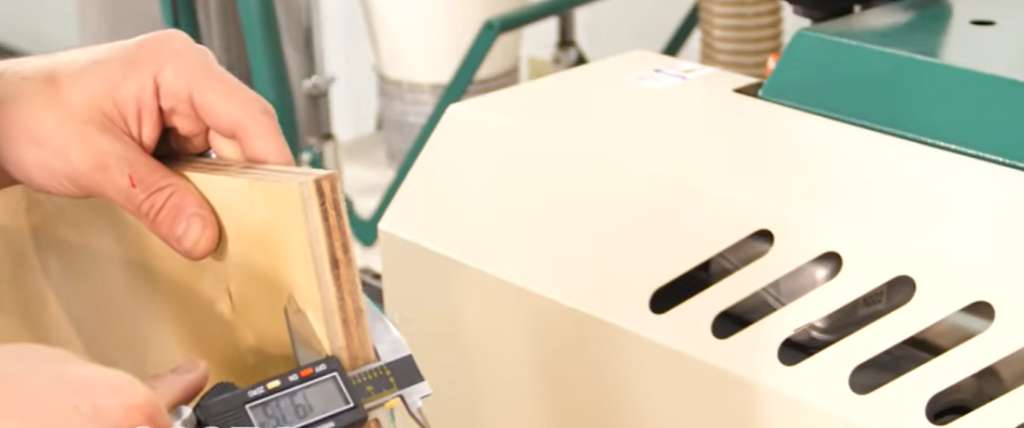
Always be sure to adjust the trimmers with each edge banding used to ensure the best finish possible.To adjust the trimmers,carefully measure the thickness of your edge banding machine in millimeters then rotate the flush trimmer adjustment knob until the readout for each matches the thickness of the banding.
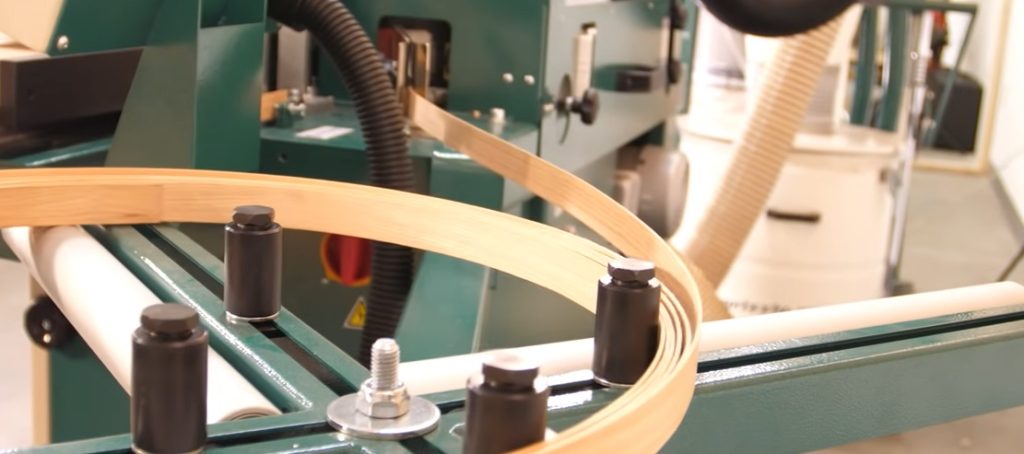
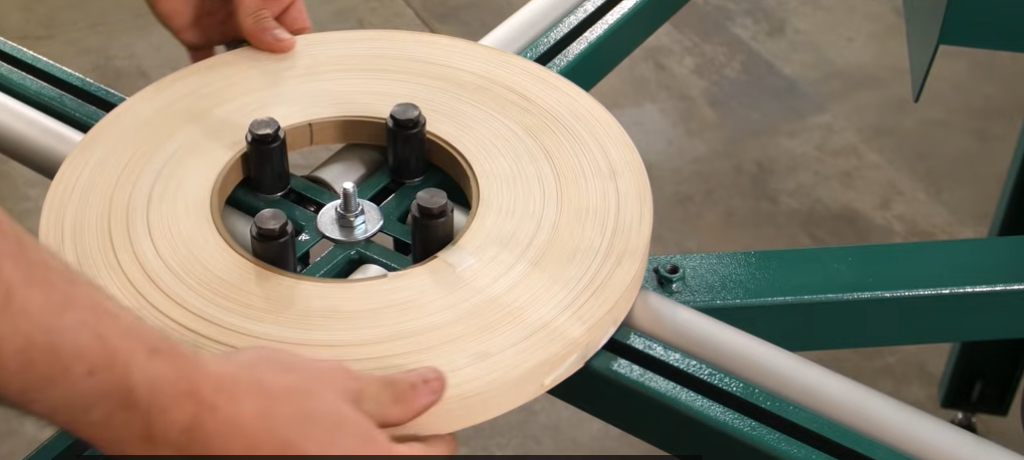
Coil of Edge Banding Machine
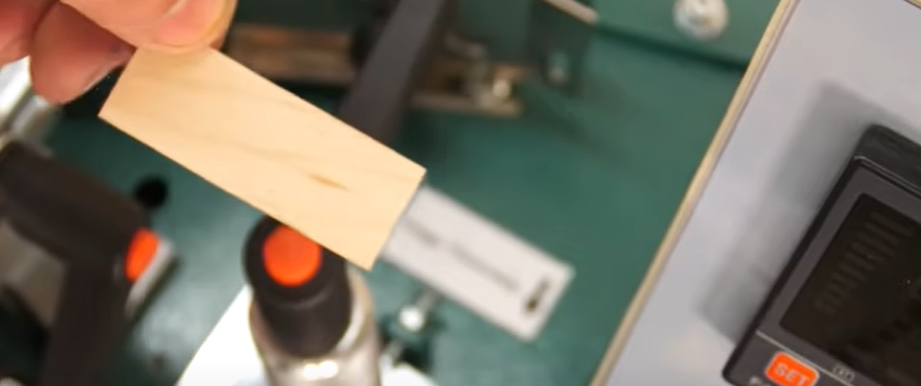
With the trimmers adjusted, let’s move on to installing the edge banding coil.The width of your edge banding tape should be slightly greater than the workpiece to ensure a crisp edge when the banding is trimmed flush.
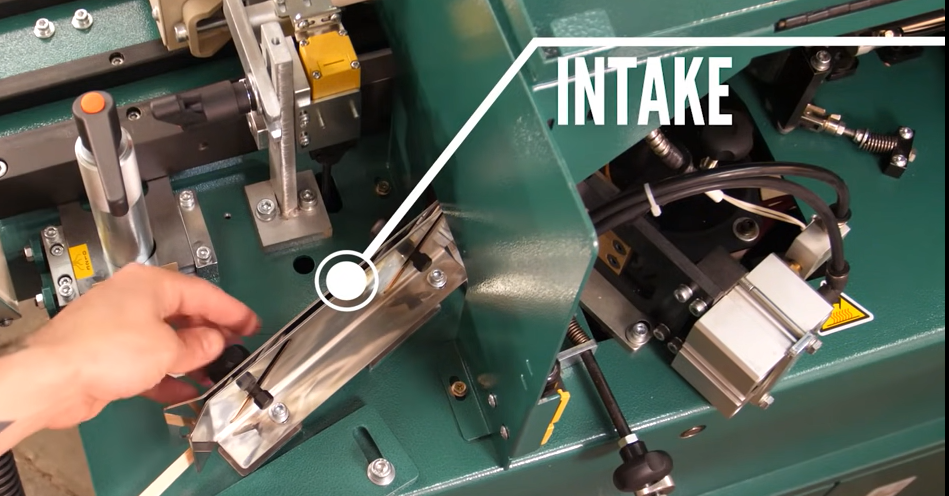
First, adjust the height knobs on the intake guides here.The height knob should just contact the top of the edge bender in the vertical position, allowing it to travel through smoothly.
Next, loosen the guide rollers on the coil support to fit inside the edge banding coil.Center the coil on the support, then move the rollers until they touch the inside of the coil, but still allow the coil to move freely.
Insert the edge banding through the intake guides and move the nylon roller release knob to the right to manually move the edge banding tape all the way forward, past the nylon rollers, to the end of the edge banding seat.
At this point you want to rotate the edge banding machine seat adjustment knob until it leaves approximately 1/32″ of vertical play, to allow the edge banding to move freely. With that set go back to the intake guide and check to see if any adjustments are needed.
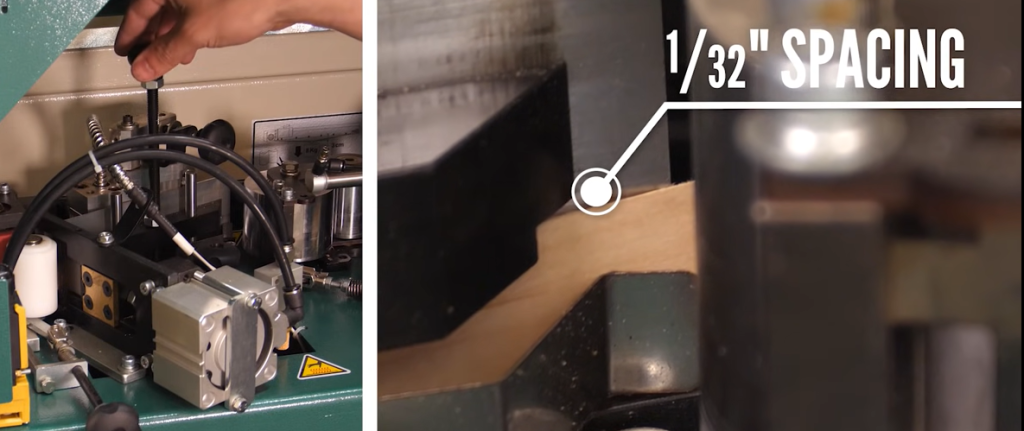
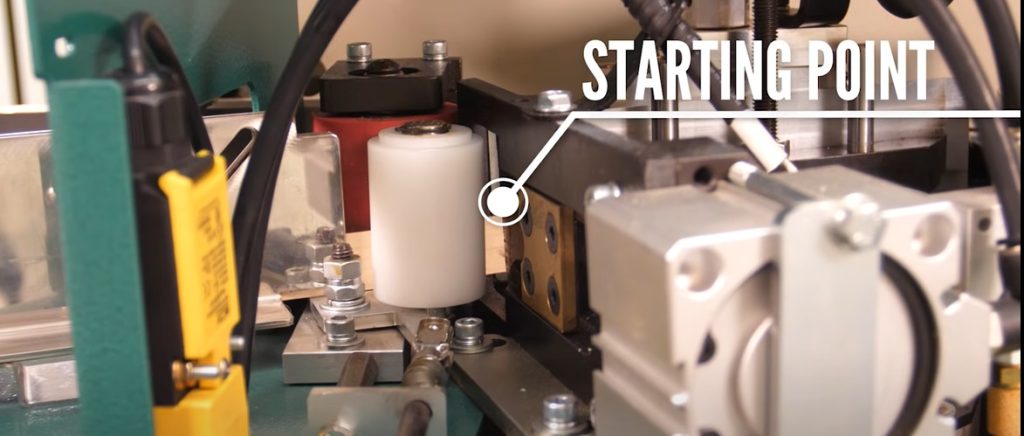
Again, you want to have about 1/32″ of play for the banding to move freely. Move the nylon roller release knob back into position, then manually move the edge banding tape back until it’s just in front of the nylon roller. This is the appropriate starting point for operation.
So, we’ve covered checking the glue pot, panel feeder adjustment, infeed fence and glue spindle alignment, and adjusting the flush trimmers for your workpiece.We also walk through installing and adjusting the EB280 for the specific type of edge bending tape you plan to use.
Start to Use the Edge Banding Machine
All that’s left is to power up the machine by turning on the master power switch, and rotating the glue pot switch to the on position.
Preheating the glue can take up to 30 minutes to completely remelt the cold glue. During this time check to make sure you have the temperature settings correct to match the manufacturer’s recommendations for the type of glue being used.
Once the glue pot is heated, turn the glue spindle button on and allow it to run while the spindle fills with glue.
Next, press the panel feeder and flush trimmer buttons to activate each feature.
Turn on your dust collection system and put on the appropriate PPE for operation. After that, simply place the workpiece against the infeed fence and slide it into the panel feeder, being careful to avoid pinching your fingers.
And the EB280 will take it from there. Then simply receive the workpiece on the out-feed side as it exits the machine. And there you have it.
With some basic setup to match your workpiece we’re now ready to run smoothly through those big jobs with the EB280 compact automatic mini edge bander.